How to Clear Windows 10 Jump Lists? [Windows 10 Tips]
Jump lists are a feature that was introduced back in Windows 7 and they are nothing more than an ‘Activity History’ about recently opened files, folders, programs, and even websites on the items that you have saved in your taskbar.
In Windows 10, this feature still exists! And just like in previous Windows versions, it will automatically save the history of your apps and display the recently opened files, folders, and URLs in both the start menu and the taskbar. To see the jump lists you just have to right-click on the icon of the app of your preference that is located on the taskbar for example, and there you will see your program’s jump list.
How to Clear Windows 10 Jump Lists?
This feature is not bad by any means, in fact, it gives more accessibility to certain users who like or need to open recent Word documents (for example) without having to search for it in your documents folder (or in the directory where you save your docs), however, if you are someone who shares your computer with other individuals like friends, roomies, or family members, this can be a little troublesome and even awkward in the case that you want some privacy on your program’s activity.
That’s why you have to learn how to perfectly clear Windows 10 Jump Lists right now! To avoid awkward moments or just because you want to have extra privacy or a more recent view of your taskbar and start menu apps. While in Windows 7 and 8, clearing this feature’s history was a simple task, for some reason in Windows 1o you have to do some extra steps, but don’t worry we have you covered! Check this 3 steps guide to get what you desire:
Step #1: Access the Personalization section in Settings.
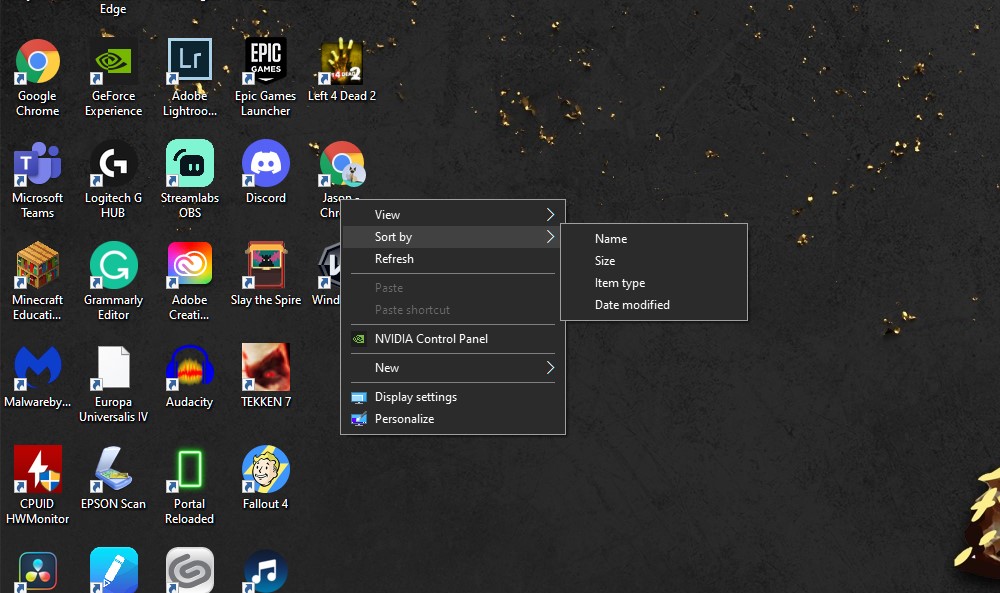
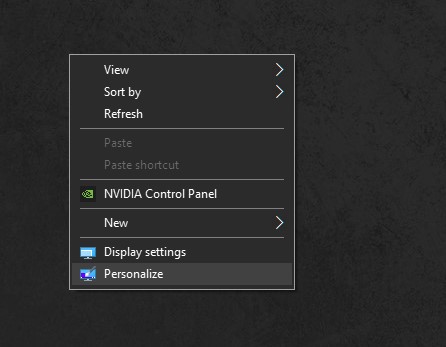
First of all, right-click on an empty area of your desktop and then proceed to click on the Personalize option which is commonly at the bottom of the list of options that pop up on the screen.
Step #2: Tweaking the Settings.
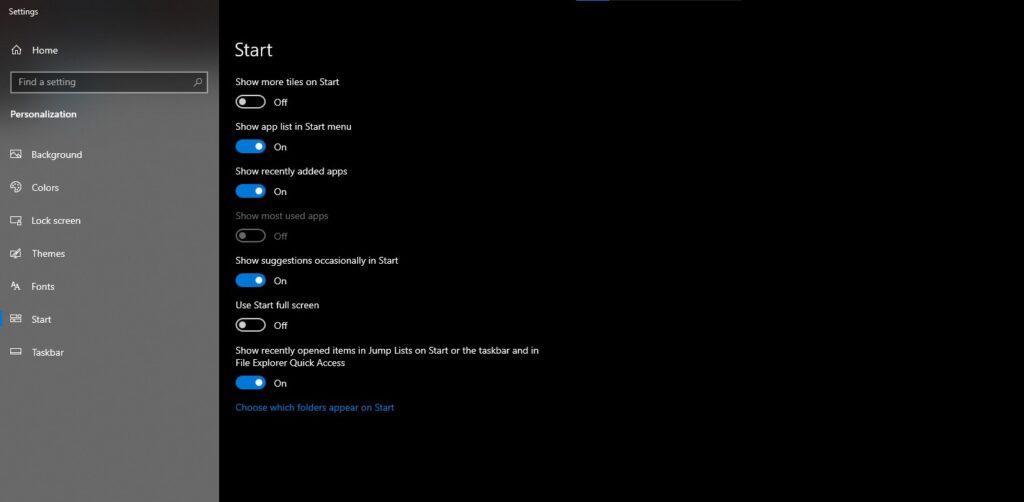
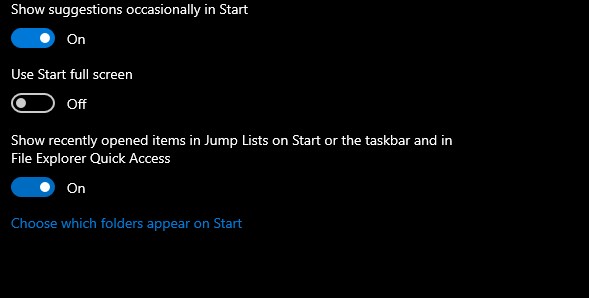
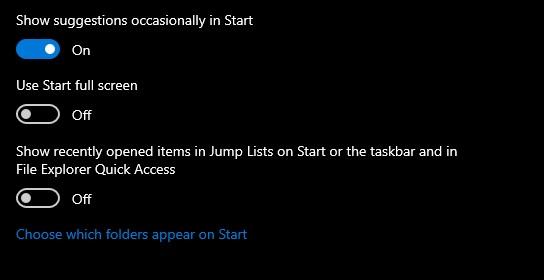
Click Start and see all the available settings that are related to the taskbar and Start menu (which are the locations of the jump lists). Then you will have to scroll down to the bottom of the settings page until you find an option called ‘Show recently opened items in Jump Lists on Start or the taskbar and in File Explore Quick Access‘ and turn it off.
Step #3: The Only remaining Process.
The final step just consists of turning on the previous option (which was turned off in the previous step) and then you will be ready to enjoy a cleared view on your jump lists, easy, simple, and practical. After some time, if you want to clear the history of this feature once again, you can follow this guide whenever you want, just make sure that the Systems’ OS consists of any Windows 10 version.
ALSO READ:
What is Fast Startup? [Windows 10]
9 Free Photoshop Alternatives



![[Steam Link] How to Play Steam Games on Your Phone?](https://technobrax.com/wp-content/uploads/2022/10/Screenshot_2022-10-04-18-30-24-971_com.valvesoftware.steamlink-1-768x355.jpg)